How to create a RIC file
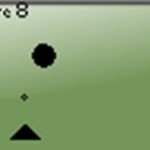
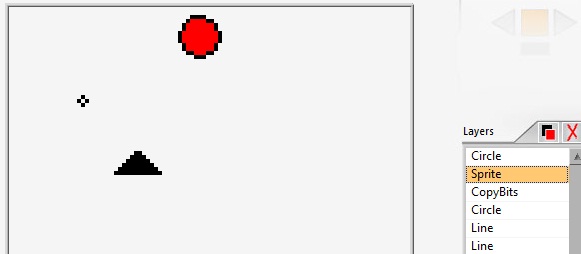
We are now going to demonstrate how to make a RIC file for a shooting game. Here we have three objects: a cannon, a bullet and a falling stone. First we start to draw the three moving objects:
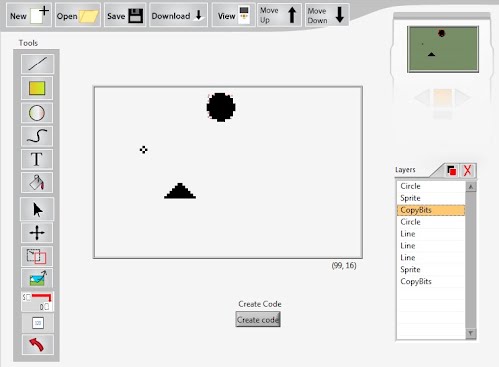
As you can see there are a total of 9 layers that make these three objects:
- Circle: this is the big circle on the top.
- Sprite: The circle is filled, and this layer is the fill.
- Copybits: This layer ensures the fill of the circle will be shown on the screen.
- Circle: The small circle which is the bullet.
- These three lines makes up the triangle that represents the cannon.
- “
- “
- Sprite: The fill of the triangle (cannon).
- CopyBits: This layer ensures the fill of the triangle (cannon) will be shown on the screen.
The two layers Sprite and CopyBits may be a bit confusing. But in a RIC file only circles, rectangles and lines will be shown directly. Other objects can be created by using a combination of a sprite and a copybit. A sprite is a bitmap. The total size of a sprite is 1024X512 pixels, but in this program the size is limited to the size of the NXT screen (100X64). So, when you draw with the commands Pencil, text and fill, these pixels is added as bits in the sprites bitmap. The program will then create a copybit, which will copy the bits from the sprite over to the LCD display memory. So let’s select the first sprite layer:
The Sprite (fill) turns red. Notice the circle outside is NOT red. It is an own layer. We now select the CopyBits layer below:

Here are two important things to notice:
- You can see a red dashed rectangle. This is the border of the CopyBits.
- Some of the filled circle is outside the rectangle. This is of course the circle layer.
To summarize this stone consist of three layers: the Circle, a sprite and the CopyBits.
If we want to move the stone, we need to move both the fill and the circle at the same time. This is a bit cumbersome to do, so now we are going to make a custom copybit for the three objects on the screen (the bullet, stone and the cannon). Let’s start with the cannon. Press the create copybit button:
![]() This window will pop up:
This window will pop up:
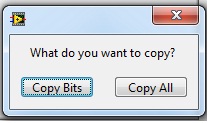
We want to copy only a part of the screen so we select Copy Bits.Another window will appear:
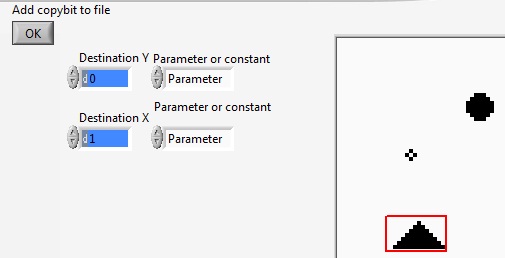
We move the mouse pointer to the upper left corner of the cannon, we left click and drag out to select the cannon (a red rectangle shows which bits we have selected to copy).
The next part needs an explanation. The Destination X and Destination Y is used to set the X and Y coordinates for this new object (the copybit). But we have to select whether it should be constant or a parameter.
If we select constant we set the actual coordinate in the blue indicator. Then we have no chance to change the coordinate in our program afterwards.
If we select parameter it is possible to change the parameter later in our program. The value in the blue indicator then represents which parameter we want to use. In a RIC file you can have as many as 16 parameters numbered from 0 to 15. We select parameter 0 for the Y coordinate of the cannon and parameter 1 for the X coordinate of the cannon.
It is very important to remember what each parameter are controlling so we prefer you to write it down on a paper or in a i.e. word processor. We are not going to show how to change the value of the parameters right now, but leave it to the programming part. We press Ok and return to the Editor again:
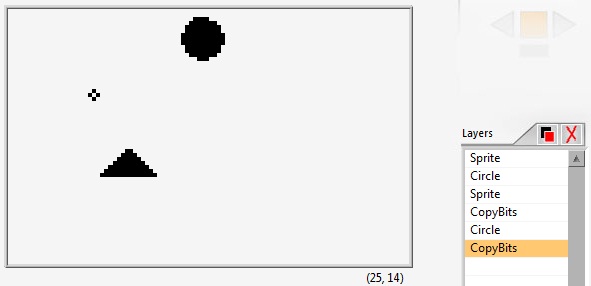
But look, what has happened to the layers list? If we count, the number of layers has changed from 9 to 6! Three are gone! What has happened? To understand this let’s take a closer look at the two layers list:
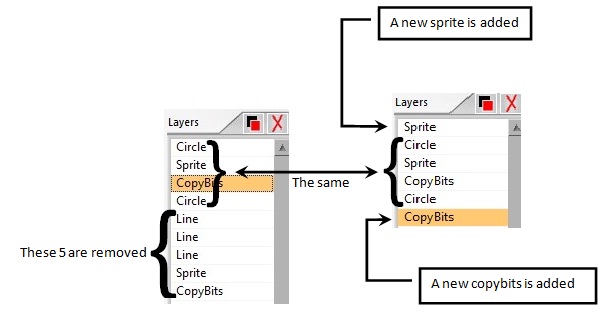
When we create a custom copybit, a new sprite is added. The size of this sprite equals the size of the screen. So the program find out what objects are inside the copybit. All objects inside will be removed (deleted) from the layers list. In this case 5 layers. Finally the CopyBits we have created will be added. Now let’s copy the bullet.Press the create CopyBits button and select CopyBits.
The window below will pop up:

Now we select the ”bullet” in the picture with the mouse and select parameters 2 and 3 for the X and Y coordinates. We do the same with the “falling stone” as shown below:

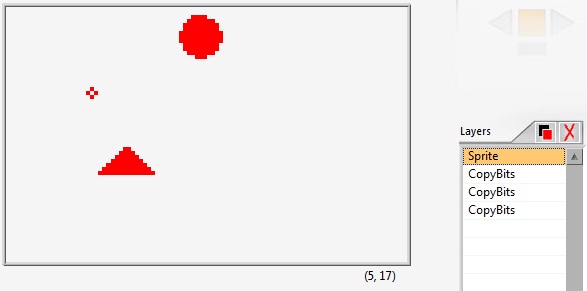
Now all our objects are copied to the file.Lets go back to the RIC Editor and select the layer Sprite. All the objects included in this layer will turn red when we select the layer. As we can see everything on the screen is in the layer:
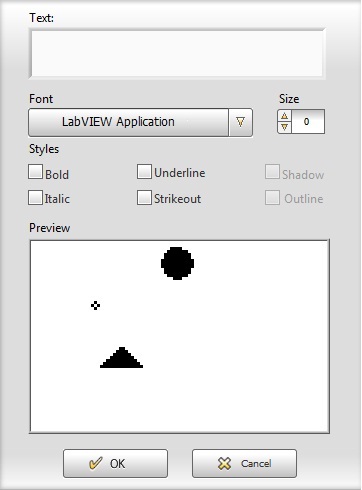
But what is missing? Yes of course a text “score” to tell us our score. Enter the text tool and we get this window:
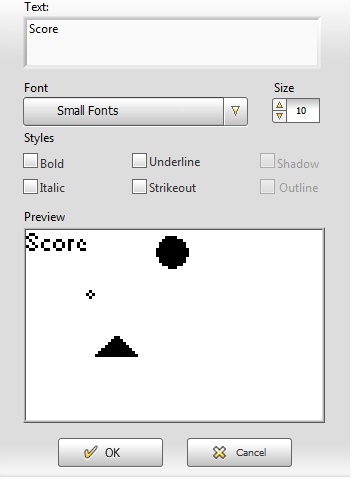
Enter the text score and select a useful font. I prefer using small font with size 10. It is also possible to move the text as I have done (top left corner):
Press the OK button and we come back to the Editor:
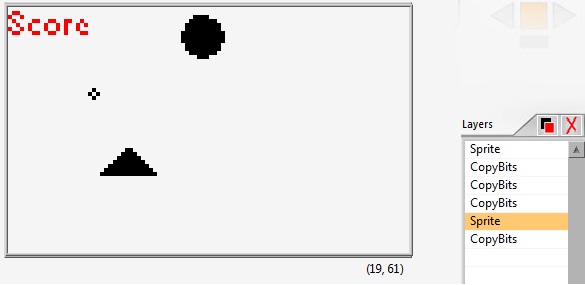
Notice we’ve got a Sprite and CopyBits for the text as we got when we filled the triangle and the circle. Finally we want a number on the screen telling us our score. Press the Num Box button:
![]()
The following window will pop up:
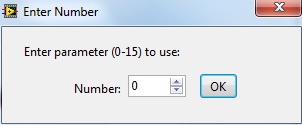
We have used parameters 0 to 5 so we must use number 6 for this one. We press OK and come back to the Editor:
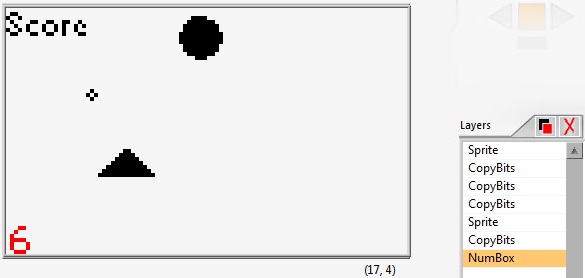
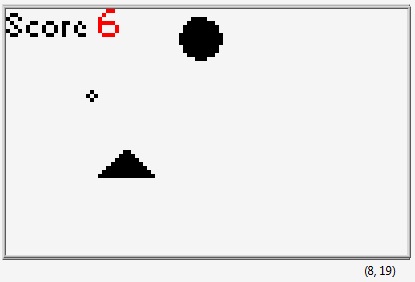
The NumBox will automatically be placed in the lower left corner (coordinates (0,64)). But at this time we want to place it next to the text Score. We select the move layer tool. it is important of course to select the layer NumBox before you do this:
![]()
Now your picture should look something like this:
The RIC file is now finished. Now let’s see how to view the RIC file.
Svein-Tore Narvestad
Latest posts by Svein-Tore Narvestad (see all)
- Create apps for NXT with MIT App Inventor - 3 August 2016
- RicEditor tutorial: Create a cannon game - 28 October 2013
- Create your own games with “RIC” files - 27 August 2013
- How to update the NXT firmware in LabVIEW - 19 August 2013
- Datalogging in LabVIEW: Timed datalogging - 2 June 2013