How to view the RIC file
While we have been making our RIC file, there has been a small preview window on the screen. But it is important to know that this is NOT a NXT screenshot. It is in fact a LabVIEW picture. But we can both watch the picture on the NXT screen and test the parameters for the file. Before we start we have to connect the NXT brick to the PC. Then we press the view button in the RicEditor:
![]()
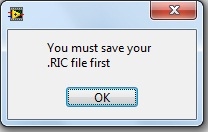
You’re asked to save the file:
 After pressing OK a file dialogue will pop up:
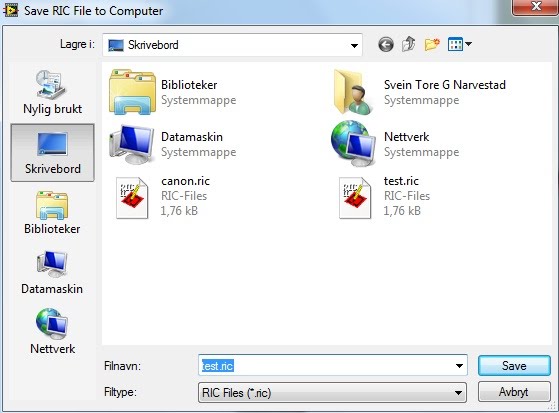
We select a file name (i.e. cannon.ric) and press save. We’ll get a new window as shown below:
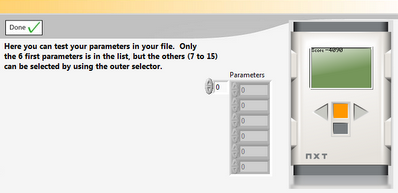
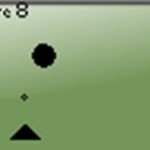
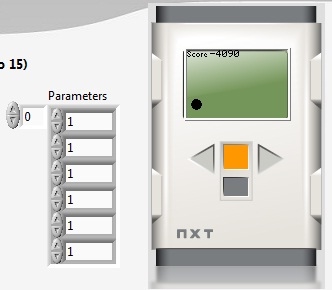
Note this picture is NOT the same LabVIEW picture as is on the main program. This is in fact a screenshot of the NXT’s Screen. If you look at the NXT’s screen you will see they are identical. But this picture does not make any sense. Where are our objects (bullet, cannon and falling stone)? And why is the score -4090?
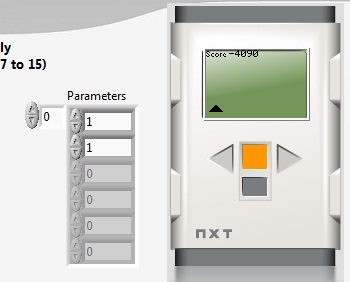
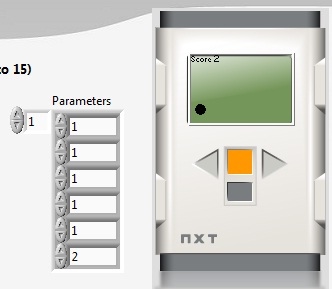
Well, if you look in the parameters list you can see they are all greyed. This means the NXT is not receiving any value. Let’s start adding values to the parameters. We start with parameter 0 and 1. Setting them both to 1, and then the cannon will appear on the screen:
Continuing with parameter 2 and 3 the bullet will appear:
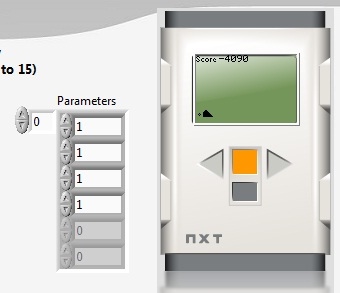
And finally, adding parameter 4 and 5 we get the falling stone:
Setting parameter 6 to 2 and the score is also OK:
But what is wrong now? Why can’t we see the cannon and the bullet? The answer is layers. Press the Done button and go back to the main window for the RicEditor:
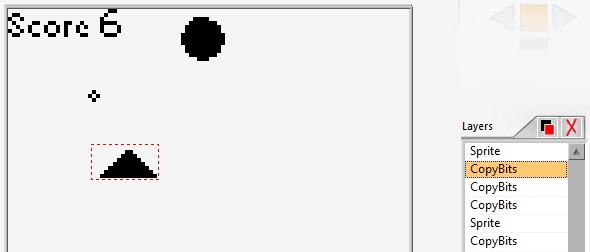
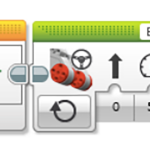
Layers 2-4 are CopyBits for the cannon, bullet and falling stone respectively. When the objects are drawn on the screen they are drawn in layers, meaning i.e. layer 3 (the bullet) comes over layer 2 (the cannon) when they have the same coordinates (or more exactly when they, in some way touch each other).
This is shown more clearly in the figure below:
Here we see the bullet is lying on a layer over the cannon. To solve this problem these two layers must swap in the layers list. This can be done by using the move up or move down buttons:
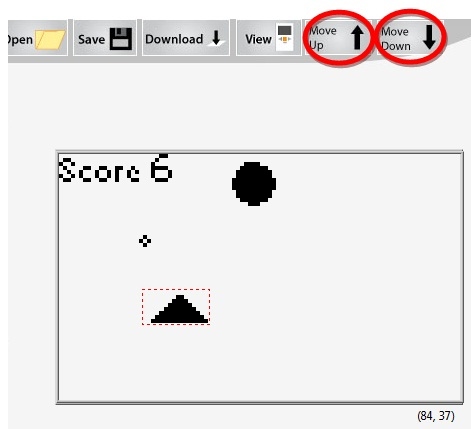
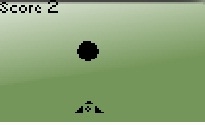
We first select the second layer element (the bullet). So we press the move down button. The bullet is now longer down in the layers list than the cannon. So the cannon will be in front of the bullet. Our new picture is shown below:
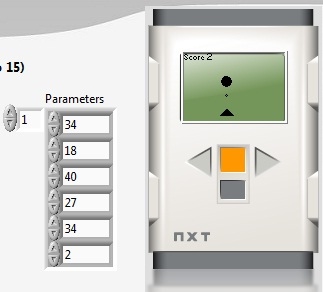
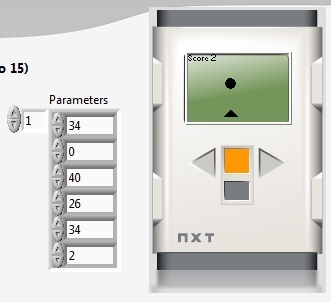
Notice the values for the bullets coordinates (parameter nr. 2 and 3). The values are 18 and 40 where 18 is the y coordinate. if we now change this to 0, the bullet will disappear, or more exactly it will be behind the cannon:
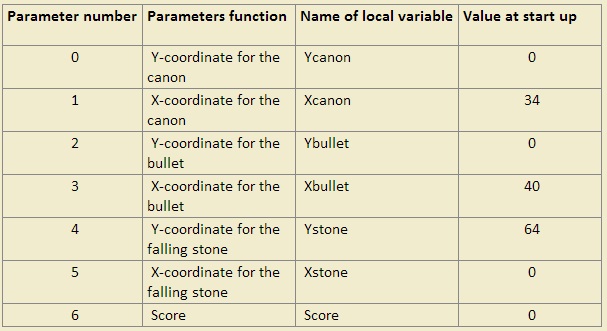
The RIC file is now finished so please save your file. But before we start with the programming, it is a good idea to set the start values for the parameters. This will ensure the objects start at the same position every time we start the game. When we start programming, we are going to use local variables. This means we have to give each parameter a name. You could of course choose what ever you want, but it is best to use logical names, and don’t select too long names. In the table below we give suggestions for this RIC file:
We are now going to start the programming. The first to do is to set up the start up loop.
Svein-Tore Narvestad
Latest posts by Svein-Tore Narvestad (see all)
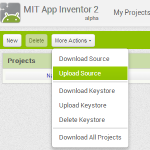
- Create apps for NXT with MIT App Inventor - 3 August 2016
- RicEditor tutorial: Create a cannon game - 28 October 2013
- Create your own games with “RIC” files - 27 August 2013
- How to update the NXT firmware in LabVIEW - 19 August 2013
- Datalogging in LabVIEW: Timed datalogging - 2 June 2013