Moving the cannon with the NXT buttons
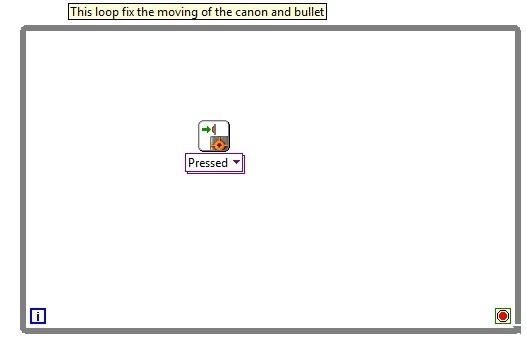
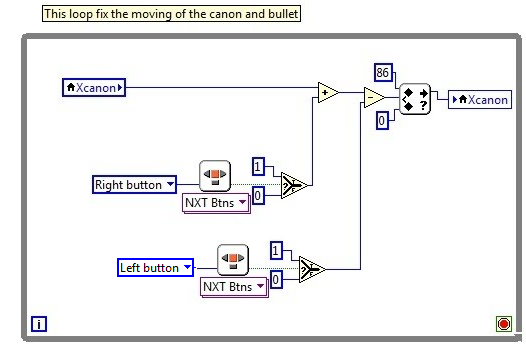
In this part of the game we want to fix the moving of the cannon with the NXT buttons (moving left and right). It is also important to keep in mind we have to move the bullet at the same time. To program this we must create a new WHILE loop in our program:
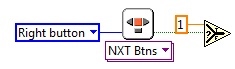
 These loops will run in parallel, so this is in fact a way to do multitasking. Let’s start with programming the right button task: moving the cannon and bullet to the right. We need the icon read sensor:
We place this in the WHILE loop:
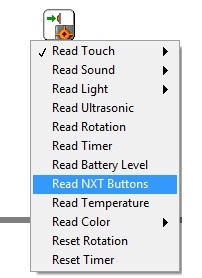
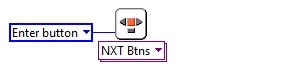
By default we get the command Read Touch. Change it by selecting Read NXT Buttons from the pull-down menu:
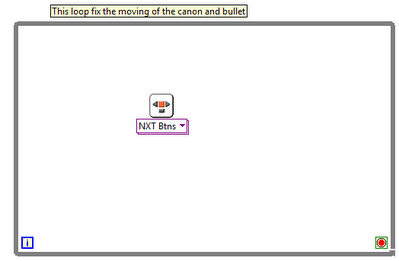
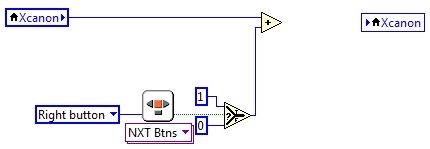
Now the WHILE loop looks like this:
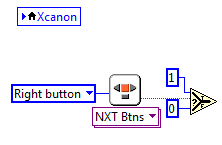
This icon reads the specified NXT button (left,enter, right). The yes/no (true/false) output will return a yes if the specified NXT button is pressed at the moment:
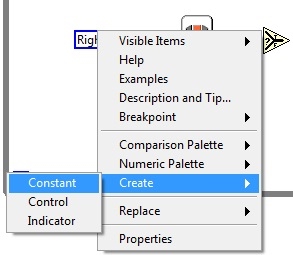
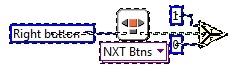
![]() In the lower left corner there is a connector called Button. We right-click and select create a constant here:
In the lower left corner there is a connector called Button. We right-click and select create a constant here:
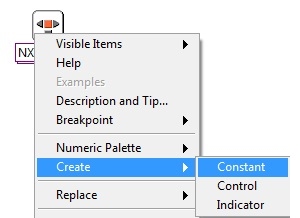 A new constant is added:
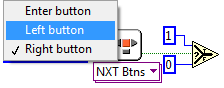
 We want to start with the right button. Select it by moving the mouse over the control and mouse click left:
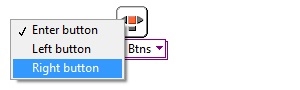
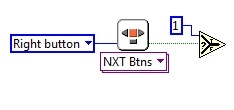
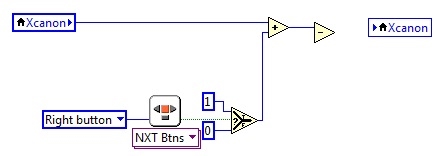
Now this icon will return a yes (true) any time the right button is pressed. We connect the Yes/No connector to the handy icon select:
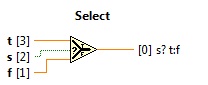
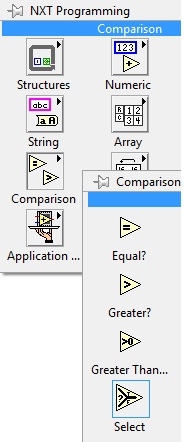
This icon returns the value wired to the t input or f input, depending on the value of s. If s is TRUE, this function returns the value wired to t. If s is FALSE, this function returns the value wired to f. The select command is found in the palette NXT programming/Comparison:
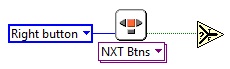
We place this icon on the diagram window, and connect the Yes/no connector on the NXT Btns to the select:
 Now we must add the connectors t and f on the select command. We first place the mouse pointer on the t connector, right-click and select create constant:
 A numeric constant will pop up:
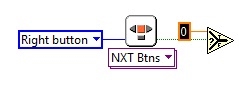
The value is by default set to zero. We must change it to 1 because we want to add 1 to the cannons x coordinate when we press the right button. Now it looks like this:
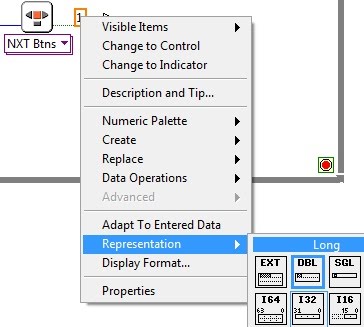
Notice this constant is orange. This is because it is of the type double precision. The advanced picture command use the type 32-bits integer, so we have to change the representation. Right-click on the constant and select representation/I32:
The constant will now change to the colour blue:
 The blue colour tells us this is an Integer. By right-clicking the f (false) on the select command and then select create constant we got a constant for the false part of the select:
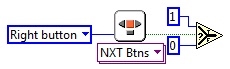
The value for this one must be zero because we don’t want to add anything to the cannons x coordinate when the right button is not pressed. Also notice this will automatically be an integer because the two inputs always will be the same. So the question of interest is: how to add the number from the select command to the control Xcannon on the front panel, so the x coordinate of the cannon will increase with 1? The answer is local variables. Local variables are found in the palette NXT programming/Structures:
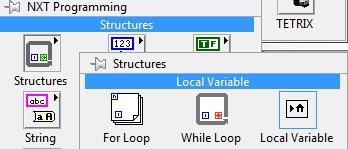
We place a local variable on the block diagram:

We can see a question mark inside the local variable. This means the variable is not configured. We have to select which control or indicator it should read or write. Left-click on the local variable and you’ll get a list of all the controls and indicators in the front panel:
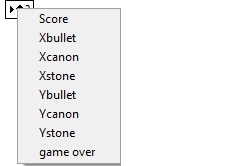
In this list all the controls and indicators are listed. Here we select Xcannon. Now it looks like this:
To the left of the local variable you can see an arrow. It is pointing in to the house, which means this local variable is configured for writing. At this moment we want to read the local variables value (the cannons x-value). So we right-click and select Change to read:

Notice the changes in the local variable:
![]()
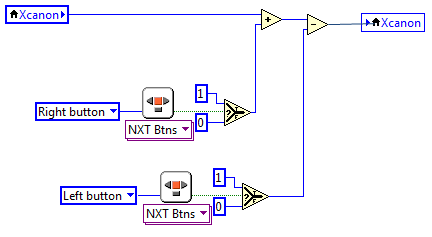
Now the arrow is to the right and it is pointing out of the house/local variable, meaning we are reading the variable. If we now insert an add command and do some wiring our diagram looks like this:

So let’s add a second local variable:

So you can left-click the local variable and select Xcannon:

Finally wire the add command to this local variable:
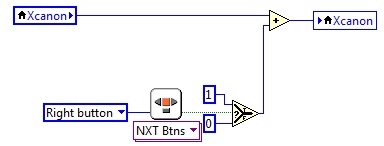
So, it’s time to give an explanation on how this code works.
At first the value of the Xcannon is read (from the control). Let’s say the value is 34. Then, if the right button on the NXT is pressed, the number one is added to the value of Xcannon. It is important to know that the value of Xcannon is not changed until the last local variable is executed. This local variable has an arrow pointed in, which means this value is written to Xcannon. In this way we have changed the value of a control on the front panel. The value of Xcannon is changed from 34 to 35. If we press the right button once again, it will change to 36 and so on.
But what if we press the left button? As the program is now of course nothing will happen. To change this we first delete the wire between the add and the local variable:
So let’s add a subtract command:
Here we need the same code as for the right button. The only difference is the constant Right button. So, by selecting this part of the code we can in fact program by using copy/paste short cut keys. First, select the code you want to copy:
Around the code we have selected there is a dashed line. Press CTRL+C to copy the code. Then, point with the mouse pointer where you want the code to appear. Finally press CTRL+V to paste the code:
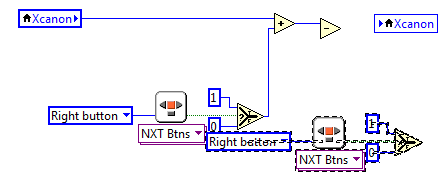
Press the arrow keys on your keyboard and move the code so it won’t lie over the other code:

So we must change the constant Right Button to Left button by clicking on the drop-down menu:
So we can wire the select command to the subtract command:
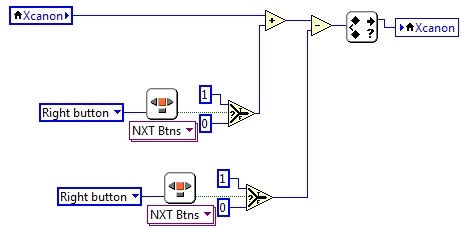
Now almost everything is perfect, but there is still a problem. If we press the Right button long enough, the cannon will leave the screen (the x coordinate becomes greater than 100). To solve this problem we must use the function “In Range and Coerce”.
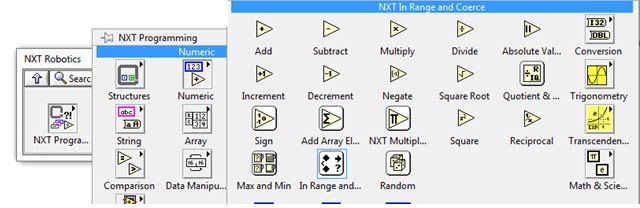
You’ll find it in the palette NXT Robotics/NXT Programming/Numeric:
Below is the help-text for this command:

Here x is the value we want to check (at this time Xcannon). If it is between the upper and lower limit, the value will be unchanged. But if it is greater than the upper limit it is coerced to the value of the upper limit. The same of course for the lower limit. The boolean In Range? is true if the value lies between upper and lower limit, else it is false.
At this moment we are not interested in that value, but we’ll have a closer look on this feature while checking out for collisions (when we want to check if the bullet hit the stone). We now insert the command in the diagram as shown below:
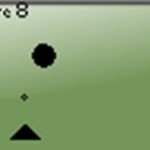
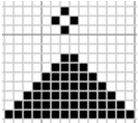
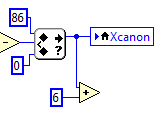
It is naturally to think the limits are 0 and 100. But let’s take a closer look at the cannon drawn with gridlines for the coordinates:

It is important to know that the CopyBits coordinates is the lower left corner of the object. So when the cannons coordinates are (100,64) as shown above, the whole cannon is outside the NXT screen. Hence the upper limit must be 100-14=86 (since the cannon is 14 pixels wide). The lower limit is of course 0. We add constants to the connectors upper limit and lower limit, and add the numbers 0 and 86:
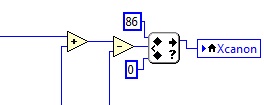
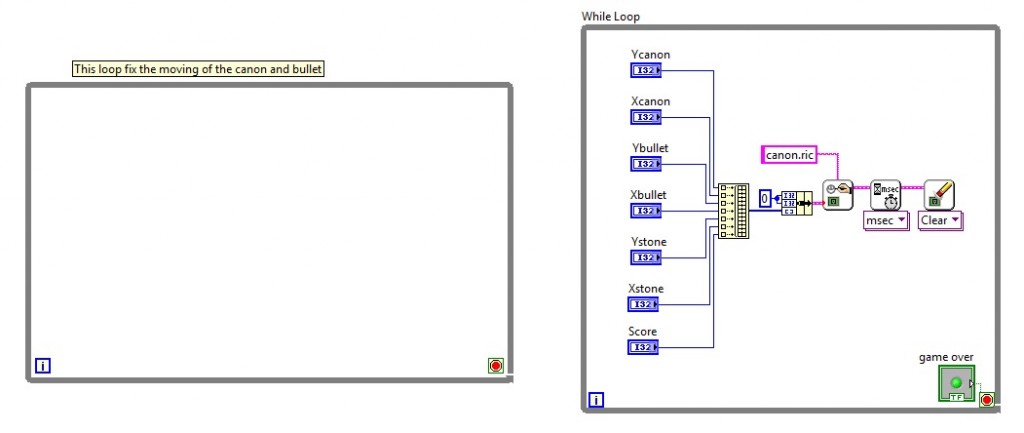
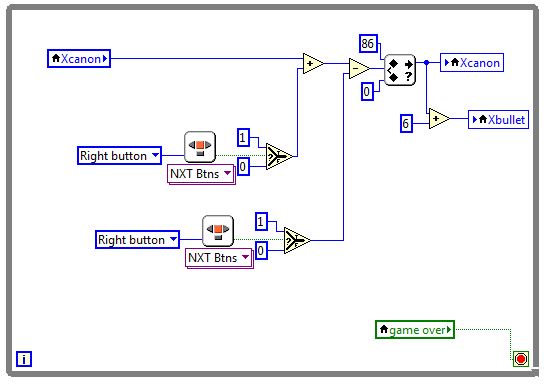
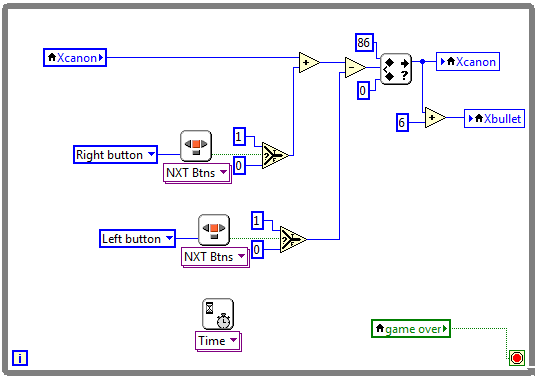
So let’s have a look at the whole WHILE loop:
This loop will fix the moving of the cannon, but NOT the bullet. To fix the movement of the bullet let us first look at the figure below:
Here the bullet and cannon has the right positions, it looks like the bullet comes out of the cannon at the middle position. The coordinates for the x-values are Xcannon=34 and Xbullet=40. The difference is 6 pixels. This means the bullets X-coordinate always must be 6 greater than the caons X-coordinate. we solve this by inserting an add command:
The upper left corner we connect to the value of the Xcannon. For the lower left corner we create a constant with the number 6:
The result of the add command is the X-coordinate for the bullet. Let’s add a local variable for Xbullet, and write to it as shown below:
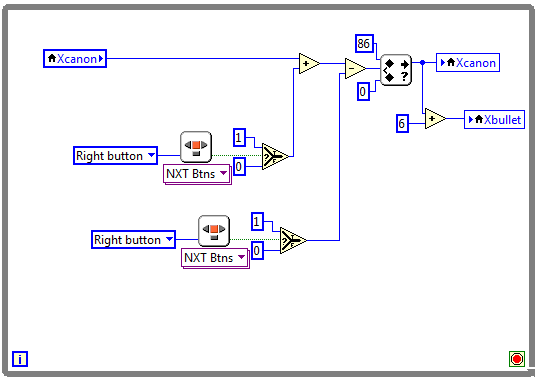
The WHILE structure is nearly finished. but we have to wire the loop condition in the lower right corner. We could have created constant for this. But we want it to stop the loop when the game is over. Therefore we add a local variable for the control game over?, change it to read and wiring this to the loop conditinal:
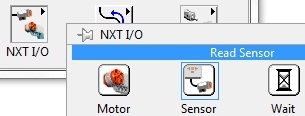
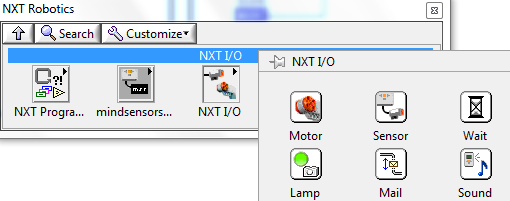
You can test the program now. But you will soon discover the cannon moves too fast. We can add a Wait for time (ms). Go to NXT Robotics/NXT I/O:
We can place the Wait command anywhere in the WHILE structure:
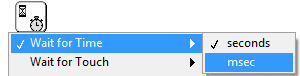
Press the dropdown menu on the comman and select Time (msec):
Right click the lower left corner and select Create constant:
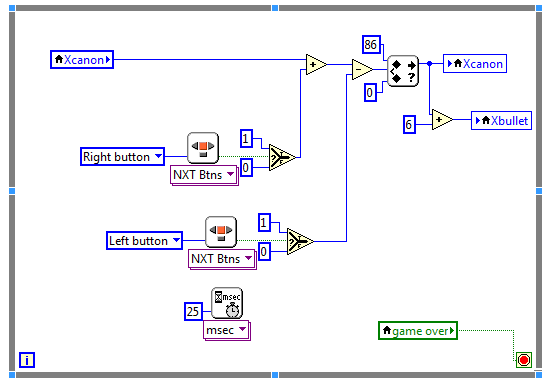
As a suggestion try with 25 msec. You can also try other values of course. it depends on how difficult you want it.
So this part of the program is OK. Lets move to how to check for collisions between the falling stone and the bullet.
Svein-Tore Narvestad
Latest posts by Svein-Tore Narvestad (see all)
- Create apps for NXT with MIT App Inventor - 3 August 2016
- RicEditor tutorial: Create a cannon game - 28 October 2013
- Create your own games with “RIC” files - 27 August 2013
- How to update the NXT firmware in LabVIEW - 19 August 2013
- Datalogging in LabVIEW: Timed datalogging - 2 June 2013